
Buying your first home in Canada is one of the biggest financial decisions you’ll make. The path from getting preapproved to closing involves multiple steps, and understanding each one helps you avoid costly mistakes.
We at Financial Canadian have guided thousands of first time homebuyers Canada through this process. This guide walks you through every stage so you can move forward with confidence.
Getting Preapproved for Your Canadian Mortgage
A mortgage preapproval is your financial green light before house hunting begins. Lenders assess your income, credit score, debt levels, and employment history to determine how much you may be able to borrow. They request recent tax returns, pay stubs, and bank statements to verify your financial stability. This process typically takes a few days and results in a conditional commitment-not a guarantee, but a solid indication of your borrowing power. The preapproval letter shows sellers you’re serious and financially capable, which strengthens your negotiating position in competitive markets.
What Your Preapproval Actually Means
Your preapproval is not binding. Lenders will underwrite the actual property and may adjust your approved amount or decline to lend once they see the specific home you’re purchasing. When you move from preapproval to final approval, the lender conducts a full property appraisal and verifies your income again with current documents. This is where many first-time buyers face surprises-if the appraisal comes in lower than your purchase price, the lender may reduce the loan amount, forcing you to cover the gap with a larger down payment. Organize your financial documents before this stage: T4s, recent pay stubs, and proof of savings. A well-organized folder speeds up underwriting and reduces delays near closing.
Rate Holds and Timing Strategy
Canadian lenders typically lock your mortgage rate for a 90- to 120-day hold. If you’re closing within that window, lock in your rate now rather than waiting. If rates drop during your hold, a mortgage broker can request a rate reduction; if rates rise, your locked rate protects you. If your closing extends beyond the rate hold period, verify your lender’s extension options-some brokers can re-lock at a better rate if the market moves in your favor. Start your mortgage process immediately for a four-month closing to convert preapproval into actual approval before your possession date, preventing last-minute financing failures. A mortgage broker gives you access to multiple lenders without triggering multiple hard credit checks, saving you time and protecting your credit score.
Moving Forward to Your Home Search
With preapproval in hand and your rate locked, you’re ready to search for the right property. Your next step involves working with a real estate agent who understands your budget and timeline, then identifying homes that fit your financial parameters. Once you find a property you want to pursue, you’ll prepare your offer with conditions that protect you throughout the purchase process.
Searching for Your Home Within Your Budget
Calculate Your True Affordability
Your preapproval letter gives you a maximum borrowing amount, but that ceiling isn’t your target spending number. Lenders calculate your approval using debt service ratios that measure how much of your gross income goes toward housing and total debt. The Gross Debt Service ratio typically caps at 39 percent of your gross household income, while the Total Debt Service ratio maxes out around 44 percent. If you earn $80,000 annually, your GDS limit sits around $3,120 monthly for housing costs. However, living at your maximum approved amount leaves little room for life emergencies, home maintenance, or interest rate increases when your five-year term renews. Try targeting 80 to 85 percent of your approved amount, not the full 100 percent.
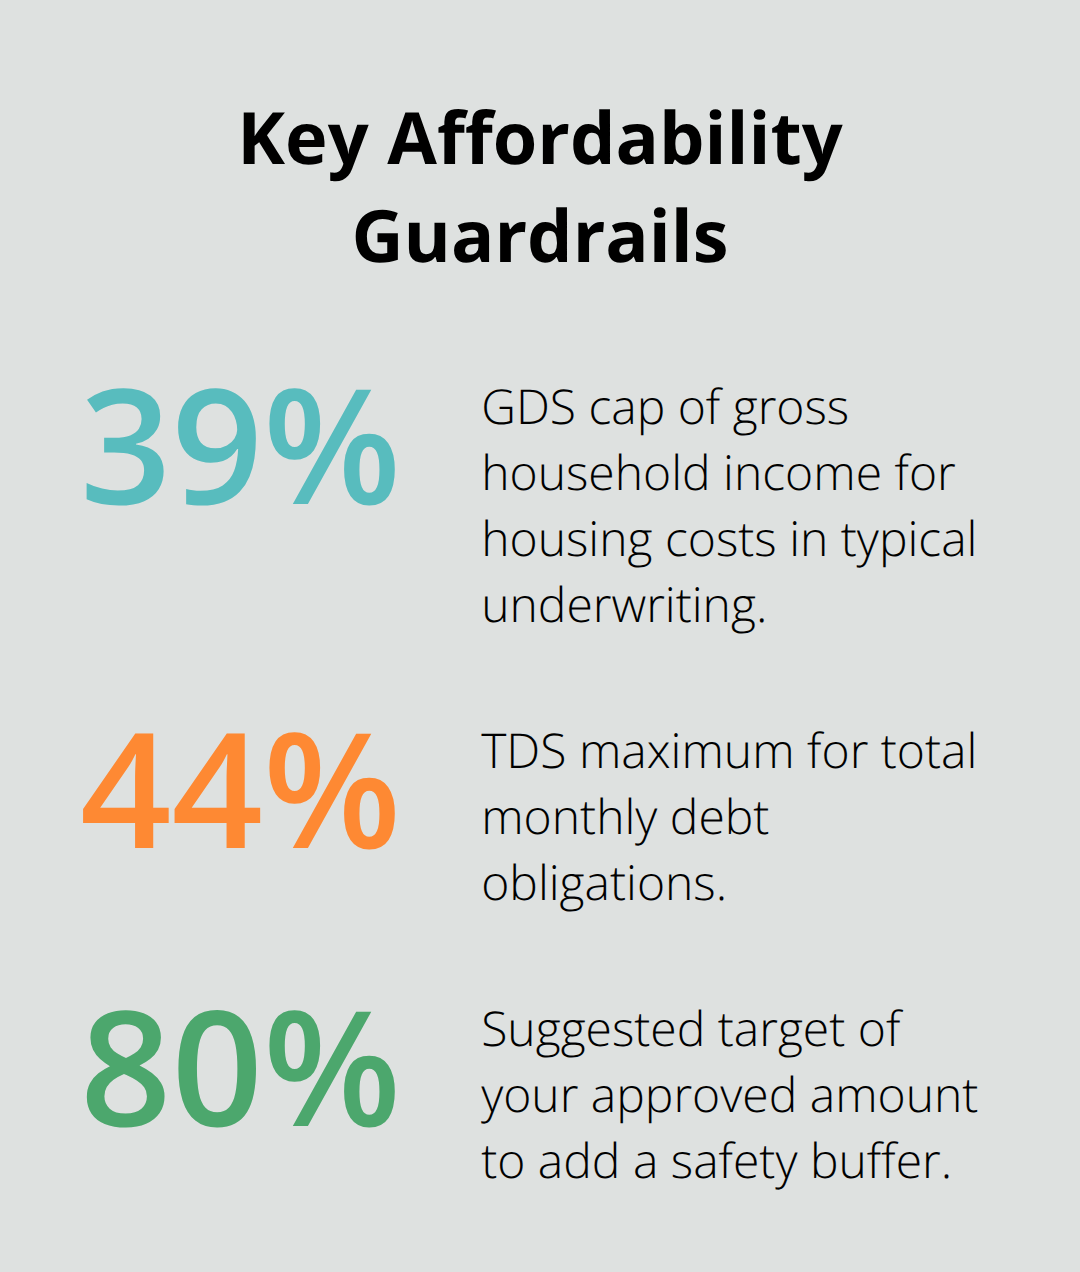
This buffer protects you when rates rise or unexpected expenses emerge. A mortgage affordability calculator helps you quantify your actual comfort zone before you start touring properties.
Select the Right Real Estate Agent
Real estate agents vary dramatically in their understanding of your financial situation and timeline. Interview at least two or three agents before committing to one, and ask specifically how they handle financing conditions and appraisal issues. A strong agent knows the local market inventory, recent comparable sales, and how quickly homes are selling in your target neighborhoods. The agent you choose will guide you through offer preparation and help you navigate negotiations with sellers.
Protect Yourself With Financing Conditions
When you find a property you want to pursue, your offer should include financing conditions that protect you if the appraisal comes in low or your underwriting uncovers unexpected issues. Never waive your financing condition unconditionally, despite pressure from sellers or agents in hot markets. If the appraised value falls below your purchase price, a financing condition allows you to renegotiate or walk away without losing your deposit. Your offer should also include a home inspection condition, typically lasting 10 to 14 days, giving you time to hire a certified inspector and address any structural or mechanical problems before closing.
Move Quickly After Acceptance
Once your offer receives acceptance, notify your mortgage broker immediately so they can begin the formal underwriting process and lock your rate within the lender’s 120-day window. The faster you move from accepted offer to formal approval, the more flexibility you maintain if complications arise during the appraisal or property inspection stages. Your broker will coordinate with the lender to schedule the property appraisal and request updated income verification documents, setting the stage for the inspection and appraisal phase that follows.
Inspections and Appraisals: What Changes Your Deal
The Home Inspection Process
After your offer receives acceptance, two critical evaluations happen in parallel: the home inspection and the lender’s appraisal. These aren’t optional formalities-they directly determine whether your purchase moves forward or stalls. A home inspector examines the property’s structural integrity, mechanical systems, roof condition, and safety issues, typically spending three to four hours on-site and charging between $300 and $600 depending on the home’s size and age.
You should attend this inspection personally rather than relying on the inspector’s written report alone. Walking through with the inspector lets you ask questions about specific concerns and understand repair priorities. If the inspection uncovers significant problems-foundation cracks, roof leaks, or failing HVAC systems-you have options: renegotiate the purchase price downward to account for repairs, request the seller cover specific fixes before closing, or walk away entirely if your financing condition permits.
Acting on Inspection Findings
Many first-time buyers underestimate how inspection findings affect timing. If major repairs are needed, you’ll need time to obtain contractor quotes and decide your next move within your 10- to 14-day inspection window. Address inspection issues immediately with your real estate agent and broker so you can either renegotiate or activate your financing condition to exit the deal if repairs prove too costly or extensive.
Understanding the Appraisal
The appraisal operates independently from the inspection and carries equal weight in your closing process. The lender orders an appraisal to confirm the property’s market value supports the loan amount you’re requesting. If the appraised value falls below your purchase price, the lender reduces the mortgage amount proportionally.
For example, if you agreed to pay $500,000 but the property appraises at $480,000, the lender may only advance $384,000 (assuming an 80 percent loan-to-value ratio), forcing you to cover the $16,000 gap with additional down payment funds or renegotiate the price with the seller. Appraisals typically take two to three weeks and cost $400 to $700; your broker coordinates this timing with your lender.
Using Appraisal Results to Your Advantage
The appraisal result gives you concrete leverage in negotiations. If it comes in low, you can present the appraisal report to the seller and request a price adjustment. Never ignore an appraisal shortfall hoping it resolves itself; address it immediately with your broker and real estate agent so you can either renegotiate or activate your financing condition to exit the deal.
Coordinating Timing and Next Steps
Coordinate your inspection and appraisal schedules early to prevent bottlenecks near your closing date. This coordination gives you time to negotiate solutions rather than rushing into closing unprepared. Your broker will work with the lender to schedule the appraisal while you manage the inspection timeline, ensuring both processes move in parallel without creating delays.
Closing Day and Beyond
Schedule a final walkthrough within 24 hours of possession to confirm the seller removed personal items, completed agreed-upon repairs, and left the home in negotiated condition. Your lawyer prepares closing documents that outline the final mortgage amount, property transfer details, and all associated costs-legal fees typically run $800 to $1,500, plus property transfer tax, title insurance, and adjustments for prepaid property taxes or utilities. Review these documents at least two business days before closing so you catch any discrepancies and allow your lawyer time to address them.
On closing day, you sign mortgage documents, transfer funds to your lawyer’s trust account, and receive the keys to your new home. Your lawyer handles the legal transfer of title to your name and registers the mortgage against the property while your lender advances funds and the seller receives payment. This coordination happens behind the scenes, but your lawyer ensures every step follows provincial regulations and protects your interests throughout the transaction.
After closing, contact your home insurance provider to confirm coverage begins immediately and update your address with Canada Revenue Agency, your employer, and your bank. Create a maintenance plan for your new home and budget for ongoing costs like property taxes, utilities, insurance, and routine repairs. We at Financial Canadian recommend first time homebuyers Canada build a dedicated savings account for home maintenance emergencies, as unexpected repairs can strain your finances if you’re unprepared-explore our mortgage guides to learn more about managing homeownership costs.











Leave a comment